Version Manager
We are using specific versions between projects such as Java, Node, and so on. It's easy to manage if you have a version manager tool. You can find a couple of version manager tools.
- SDKMAN: https://sdkman.io/
- Node Version Manager; NVM: https://github.com/nvm-sh/nvm
- asdf Version Manager: https://asdf-vm.com/ (Recommend)
- Homebrew for Mac
I have been compared with almost all version managers. I decided and settled down using asdf manager. It is better for all use cases.
asdf Version Manager
asdf is a tool version manager. All tool version definitions are contained within one file (.tool-versions) which you can check in to your project's Git repository to share with your team, ensuring everyone is using the exact same versions of tools.
asdf provides a single interface and configuration file to simplify development workflows, and can be extended to all tools and runtimes via a simple plugin interface.
Getting Started
- Installing dependencies
- Downloading
asdfcore - Installing
asdf - Installing a plugin for each tool/runtime you wish to manage
- Installing a version of the tool/runtime
- Setting global and project versions via
.tool-versionsconfig files
1. Install Dependencies
asdf primarily requires git & curl.
$ brew install coreutils curl git gpg gawk
Optionally, check other dependencies based on what you need.
curl,git: Required by asdfbash,tar,unzip,coreutils: generic POSIX utilities. These should be installed by default on most operating systems.- Python 3.8+ (v1, v2 when building from source) https://aws.amazon.com/blogs/developer/python-support-policy-updates-for-aws-sdks-and-tools/
make/autotools(v2 when building from source)Rosetta 2(v2 when using the pre-built installers on Apple Silicon)
2. Download asdf
You can download with git command or brew command.
# git command (recommended)
$ git clone https://github.com/asdf-vm/asdf.git ~/.asdf --branch v0.14.0

# or brew
$ brew install asdf
3. Install asdf
You should execute the executable script in your shell depending on your shell type.
From Git
- Bash
- Zsh
- PowerShell
Add the following to ~/.bashrc
$ . "$HOME/.asdf/asdf.sh"
Completions must be configured by adding the following to your .bashrc
$ . "$HOME/.asdf/completions/asdf.bash"
Add the following to ~/.zshrc:
$ . "$HOME/.asdf/asdf.sh"
OR use a ZSH Framework plugin like asdf for oh-my-zsh which will source this script and setup completions.
Add the following to ~/.config/powershell/profile.ps1:
$ . "$HOME/.asdf/asdf.ps1"
From Brew
- Bash
- Zsh
- PowerShell
Add asdf.sh to your ~/.bashrc with:
$ echo -e "\n. \"$(brew --prefix asdf)/libexec/asdf.sh\"" >> ~/.bashrc
Completions will need to be configured as per Homebrew's instructions or with the following:
$ echo -e "\n. \"$(brew --prefix asdf)/etc/bash_completion.d/asdf.bash\"" >> ~/.bashrc
Add asdf.sh to your ~/.zshrc with:
$ echo -e "\n. $(brew --prefix asdf)/libexec/asdf.sh" >> ${ZDOTDIR:-~}/.zshrc
OR use a ZSH Framework plugin like asdf for oh-my-zsh which will source this script and setup completions.
Completions are configured by either a ZSH Framework asdf or will need to be configured as per Homebrew's instructions. If you are using a ZSH Framework the associated plugin for asdf may need to be updated to use the new ZSH completions properly via fpath. The Oh-My-ZSH asdf plugin is yet to be updated, see ohmyzsh/ohmyzsh#8837.
Add asdf.sh to your ~/.config/powershell/profile.ps1 with:
echo -e "\n. \"$(brew --prefix asdf)/libexec/asdf.ps1\"" >> ~/.config/powershell/profile.ps1
asdf scripts need to be sourced after you have set your $PATH and after you have sourced your framework (oh-my-zsh etc).
Install Essential Components
Install Node JS plugin
Let's install a popular tool. We will install & set Node.js via the asdf-nodejs plugin.
Follow commands,
# add plugin
$ asdf plugin add nodejs https://github.com/asdf-vm/asdf-nodejs.git # or
$ asdf plugin add nodejs

# show all versions with nodejs
$ asdf list-all nodejs

# install specific versions
$ asdf install nodejs 16.20.2
$ asdf install nodejs 20.11.0

# show installed nodejs versions
$ asdf list nodejs

# set global nodejs version
$ asdf global nodejs 20.11.0 # it will create .tool-versions in your profile directory

# set local version of nodejs in a specific project
$ cd your_specific_project
$ asdf local nodejs 16.20.2 # it will create .tool-versions in the directory

# check current version
$ asdf current nodejs

# check all tools you have
$ asdf current
Now, you have two versions of the Node JS and you can switch it between directories what you defined.
If you have nvm version manager and want to use .nvmrc file instead of .tool-versions, you can put an option below.
asdf-nodejs supports this via both .nvmrc and .node-version files. To enable this, add the following to your asdf configuration file $HOME/.asdfrc:
legacy_version_file = yes
Complete!
Let's install Java SDK.
Install Java SDK plugin
Follow commands,
# add plugin
$ asdf plugin add java https://github.com/halcyon/asdf-java.git # or
$ asdf plugin add java

# list all java version
$ asdf list-all java

# install specific java versions (two popular versions)
$ asdf install java zulu-8.74.0.17
$ asdf install java zulu-17.46.19

# setup global or local version
$ asdf global java zulu-17.46.19
$ cd your_project
$ asdf local java zulu-8.74.0.17
That's it!
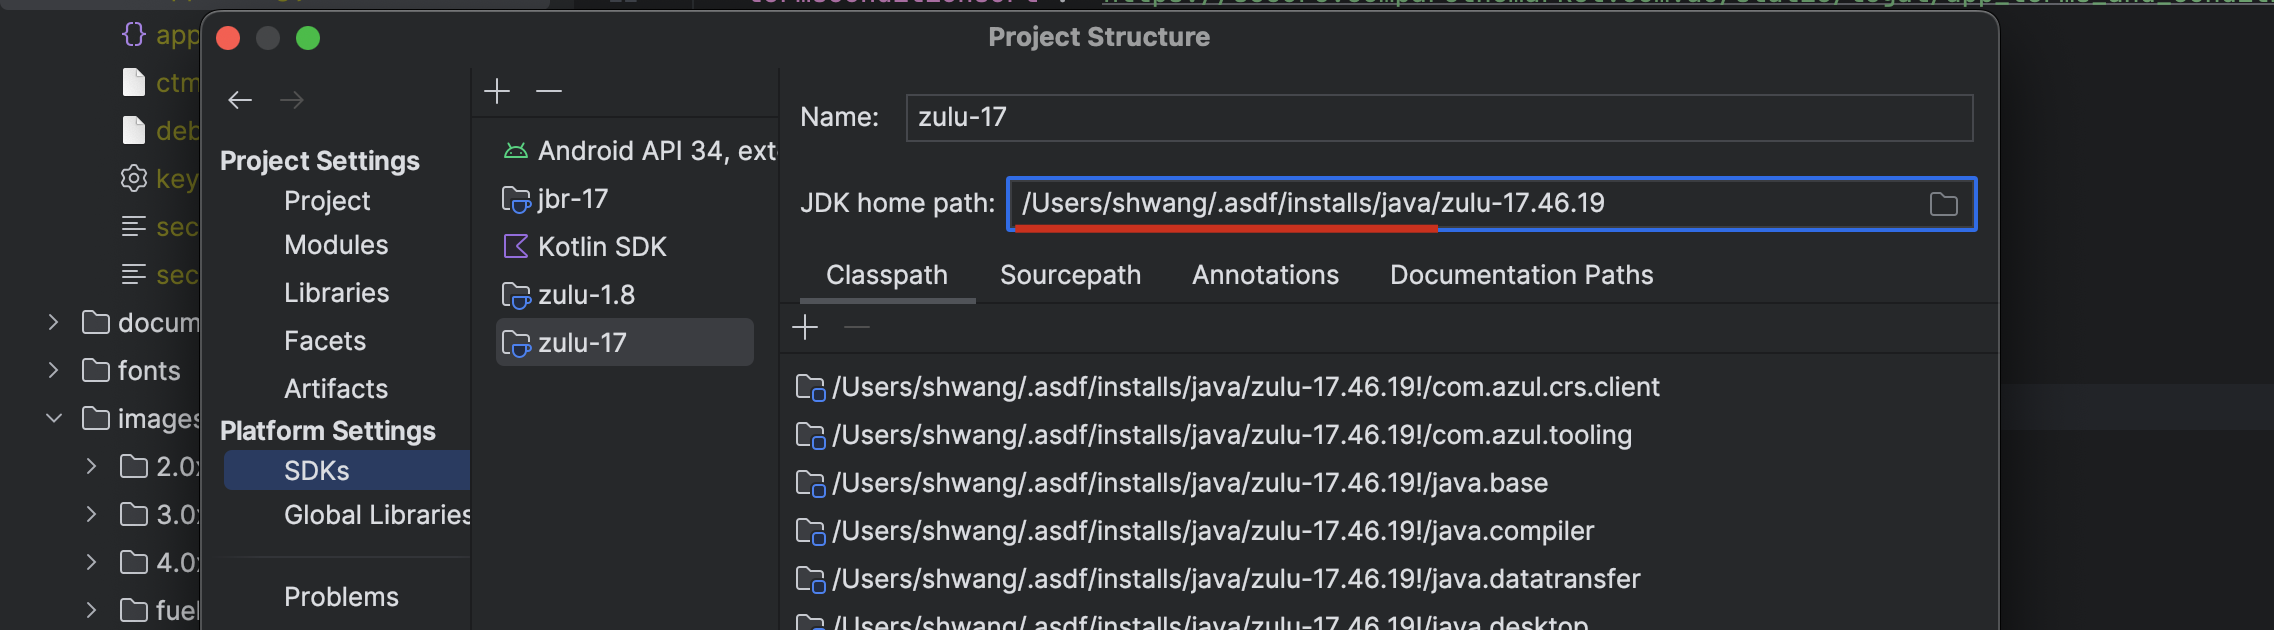
If you are using the IntelliJ IDEA, you can set your java version in the setting menu by selecting a specific directory.
In the same way, you can find other tools in ~/.asdf/installs/ directory.
Install Optional Components
Install Other plugins
In the same way, you can install your favourite packages. Find out in the Github by typing asdf your_tool_name.
I have a list that we use.
AWS Command Line Interface - awscli
The AWS Command Line Interface (AWS CLI) is a unified tool to manage your AWS services.
Ref. https://aws.amazon.com/cli/
Add asdf-awscli plugin
$ asdf plugin add awscli
# or
$ asdf plugin add https://github.com/MetricMike/asdf-awscli.git
Install a specific awscli plugin
# Show all installable versions
$ asdf list all awscli

# Install
$ asdf install awscli 2.15.17

# Set a version globally (on your ~/.tool-versions file)
$ asdf global awscli 2.15.17

# Now awscli commands are available
$ aws --version
v1 - Linux/MacOS/Windows
Only the pre-built installer is supported by this plugin for AWS CLI v1. If you need to build from source, install via pip.
Note: The pre-built installers require a Python 3.8+ distribution at install-time and this Python must remain installed as they're just creating an isolated virtualenv and copying their site-packages over. Refer to the AWS CLI v1 Python version support matrix for which Pythons support which AWS CLI versions. If you remove the Python distribution used at install-time, you must reinstall AWS CLI.
v2 - Pre-built Installers
The macOS flavor only provides an x86_64 binary. You must install Rosetta 2 if using Apple Silicon (M1/M2/arm64).
The Linux flavor provides both x86_64 and aarch64 binaries, but has dependencies on glibc, groff, and less. Alpine/musl users should build from source.
The Windows flavor technically works, but ASDF's support for Windows isn't 100% yet.
v2 - Build and install from source
This is only supported starting from v2.10.0 / 2023-02-15
Building and installing from source requires a Python 3.8+ distribution at build-time. This plugin uses the --with-install-type=portable-exe and --with-download-deps flags to download all required Python dependencies and freeze a static copy of the build-time Python distribution. After a successful installation, there are no dependencies to your build time environment, and the ASDF installs folder could be shared with another air-gapped system that did not have a Python installation.
Check asdf readme for more instructions on how to install & manage versions.